Friday, July 22, 2011

Late June Harvest


The summer heat here in Montana has made the veggies on the farm kick into high gear. The greenhouses and field gardens are bursting with flowers, herbs, and veggies.


Thursday's harvest here on the farm brought the CSA members a full box of mixed lettuce, dill, parsley, garlic scapes, radishes, turnips, spinach, carrots, braising greens, sunflowers, baby beets, and fennel. Baby beet greens can be steamed or tossed into a stir fry, and the following is a recipe for Shaved Fennel Salad from Super Natural Everyday by Heidi Swanson.


Shaved Fennel Salad

If you're using a knife to prep here, do your best to slice things very, very thinly - not quite see through thin, but close
1 medium-large zucchini, sliced into paper thin coins
2 small fennel bulbs, trimmed and shaved paper-thin
2/3 cup / .5oz/ 15g loosely chopped fresh dill
1/3 cup / 80ml fresh lemon juice, plus more if needed
1/3 cup / 80ml extra virgin olive oil, plus more if needed
fine grain sea salt
4 or 5 generous handfuls arugula
Honey, if needed
1/2 cup / 2 oz/ 60g pine nuts, toasted (I used almonds)
1/3 cup / 2 oz / 60g / feta cheese, crumbled
Combine the zucchini, fennel and dill in a bowl and toss with the lemon juice, olive oil and 1/4 teaspoon salt. Set aside and marinate for 20 minutes, or up to an hour.
When you are ready to serve the salad, put the arugula in a large bowl. Scoop all of the zucchini and fennel onto the arugula, and pour most of the lemon juice dressing on top of that. Toss gently but thoroughly. Taste and adjust with more of the dressing, olive oil, lemon juice, or salt if needed. If the lemons were particularly tart, you may need to counter the pucker-factor by adding a tiny drizzle of honey into the salad at this point. Let your taste buds guide you. Serve topped with pine nuts and feta.
Serves 4 to 6.
Prep time: 10 min

Thursday, July 7, 2011

June 29 2011 - Hot Day

Goats living on the Harvest House Farm

Jill is laying the tarp down before adding wood chips. 

Jill continuing to lay down the tarp.

Lori doing some finishing touches on the hoop house.


Now that it's officially summer, sprinklers are set up.  

Monday, June 20, 2011

June 15, 2011 - Sunny Day

 Vegetable plants installed into the new Hoop House. 

Kat and Niels getting ready to plant some Jack O' Lanterns 

Jefe chillin' in the sun.

Jill plants Jack O Lanterns, while her kids watch very closely.

Jefe and Scooter (the dogs), Jill and her kids, and Niels working hard to make the Harvest House Farm fantastic!

Kat thinking...

Peppers with a new home in the new hoop house.

Wild flowers from last year are blooming

Friday, June 3, 2011

June 1, 2011 - Let there be sun

Savoy Cabbage

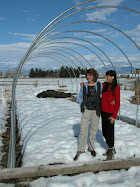
Hoop House is Up! Lori's farm workers helped raise the tarp on Tuesday.

A lot still needs to be done...

A row of new vegetables getting a drink.

The Rooster

Thursday, May 19, 2011

May 17, 2011: Beautiful Spring


Anise Hyssop Haiku:

I love the sunshine
During June to September 
 I turn lavender 


Braising Mix


 Cotoneaster


Fennel
The oldest recorded Mediterranean herb. Flies dislike powdered fennel, so people use it in kennels and stables.


Hoop House
Great benefits to farming: Longer growing season; protect plants from harsh weather; more varieties of plants can be grown; creates natural heating system


Daffodils
The trumpet-shape with star petals spreading outward; a symbol of friendship. 


Farm volunteer sewing the holes in the tarp.


Yummy Lettuce


Jefe smells something...


Parsnips


Peppers 


Baby Spruce Tree


Shallots


Spinach and Radishes

Tuesday, August 17, 2010

Artisan Grilled Bread

Amber has made this bread for our workers a few times now. A delicious recipe; so we decided to share! A beautiful, delicious, and perfect addition to any summertime meal!

For a Printer Friendly Version send us an email at: harvesthousefarm@gmail.com!!! We'll send you a recipe card!


Start with just about any sturdy bread dough recipe--I like to use a pizza dough. These grilled breads are fantastic for summer pizzas made right on the grill!

1 T Honey (or Sugar)
1 c Warm water
1T Active Dry Yeast (Sometimes I use the Instant Bread Machine Yeast, it all works!)
2 ½-3 cups Flour-- Start with 2 1/2 c and add more as needed!
1T Olive Oil
1 tsp Salt
Mix the honey and yeast into the warm water. Give it a good wisk and let it sit for a minute. It should be kinda milky and frothy looking after a minute or two. If not you might not have the right temp water, you can start over. (Or just carry on! :) the bread will still be delicious just heavier!)
At this point if you want any dried herbs for flavoring add them to the warm water as well! (ie. basil flakes, rosemary, chili flakes, or anything else you love!
Add the flour, salt, and olive oil. Mix it with a wooden spoon until the dough starts to come together. At this point feel free to add anything else to your dough that you might like! (ie. cheddar cheese, chopped spinach, or roasted garlic)--Experiment with amounts, you can add quite a bit of things like spinach without having too much of an effect on the dough. Plus it gives it a great green color!
Dump it out onto a floured counter once things are incorporated and give it a good kneading. 5 minutes or so. The dough should be fairly stiff. If it is really sticky keep adding flour. Not too much kneading! I go for a pretty minimalist input dough, it's nice and easy that way!
Shape the dough into a ball and set in a bowl with just a little olive oil. Roll it around to coat the surface--this will help keep a crust from forming on it while it rises. Loosely cover it with a kitchen towel or saran and let it sit for 30min-2 hours. If you are preparing the dough to be used a little later throw it in a ziplock and put it in the fridge at this point. Before you make you bread a bit later pull the dough out and set it in a warm place to rise a while. You can keep this dough in your fridge for a few days if you don't use it right away!
Like I said earlier if something doesn't seem right, (like it's not rising much) KEEP GOING with it! I promise you it will still be fantastically delicious!
Start up your grill at this point! If you are using charcoal it should be at a fairly hot temp, on a gas grill I usually go between medium and high.
Once you dough has risen for a while punch it down and cut the dough ball into small chunks. --tennis ball size-ish?... Flour your counter or sprinkle it with a little cornmeal and roll the chunks into flats using a rolling pin. The flats should be approximately 1/4 inch thick, but a little thicker or thinner is just fine.
Give the flats a tiny brush of olive oil and set them onto the hot grill. You will be able to tell the hot spots because the dough will start to bubble as it cooks. They only need 3-5 minutes on each side depending on how hot your grill is set. When the first sides have browned (you'll get great grill marks!), brush the tops with a little olive oil and flip them over. If you are making grilled pizza's this is the point when you put your toppings on-- maybe a dab of pesto, a sprinkle of cheese, and some grilled sweet peppers? yum!! If not, just grill the second side the same as the first!


And Ta-Dah!! You have just made Artisan Grilled Bread! Serve them fresh with your meal or keep some in the fridge to eat with Hummus or to use for a sandwich later!
This recipe has been adapted from Olivelle's "Caramalized Garlic Pizza Dough". Check them out for more great recipes and food items! They are a locally owned Bozeman store with the highest quality products and most knowledgeable employees! www.olivelle.com


Thursday, July 15, 2010

Weed and Feed SUCCESS!

We would like to extend a huge 'Thank You' to everyone who came to the farm on the 4th for our  Weed N' Feed event!
Volunteers rode bikes and drove from all over the valley to help out!

A volunteer walks through the garden looking for weeds.

Jefe looking his best as usual... maybe trying to eat some weeds out, by the looks of the dirt on his face?

Some grilled flatbread, as part of the morning's feast.  Yum!

All of the above photos were taken by Paul, spending the day in the garden with his dad.

The photos below were taken by Emma.
The green house rolled up for ventilation.

Hey, is that Lori and Karen in the greenhouse?  That's a familiar sight!

Some beautiful summer flowers.  Looks like they recovered from the hail alright.

Volunteers Dylan and Tim pull their weeds to earn their feed!

Tomato plants in good form on their trellis.

A little tree starting to grow up strong.

So much hard work was done by all of our volunteers!  Thank you all so much!  We could have never done it all without you. 


...not to mention eating all that spinach by ourselves!


*All these pictures were so kindly contributed by our volunteers.  Please respect our fabulous photographers and assume every one of them is protected by copyright.  Thanks!